Replacing the battery on Nest Outdoor Camera
A while back the battery failed on my Nest Outdoor Camera, literally a week after warranty ran out. I asked, but Google would not repair it.
Somehow I managed to track down a replacement battery for $25, so I decided to attempt to salvage the device. While you can run it wired indefinitely, it will continually pester you about 0% battery if the battery is bad.
Since I haven’t found any documentation on the internet to do this, I’ll describe the process in my little corner of the web. Hope this gets indexed.
Things you’ll need:
- A good, very thin spudger or a tiny flathead screwdriver, for leverage
- A long T6 screwdriver head. You can’t use a simple swappable head with a long extender; it needs to be thin all the way down, at least 3 inches.
- A replacement battery. I used an OEM part sourced from Ebay.
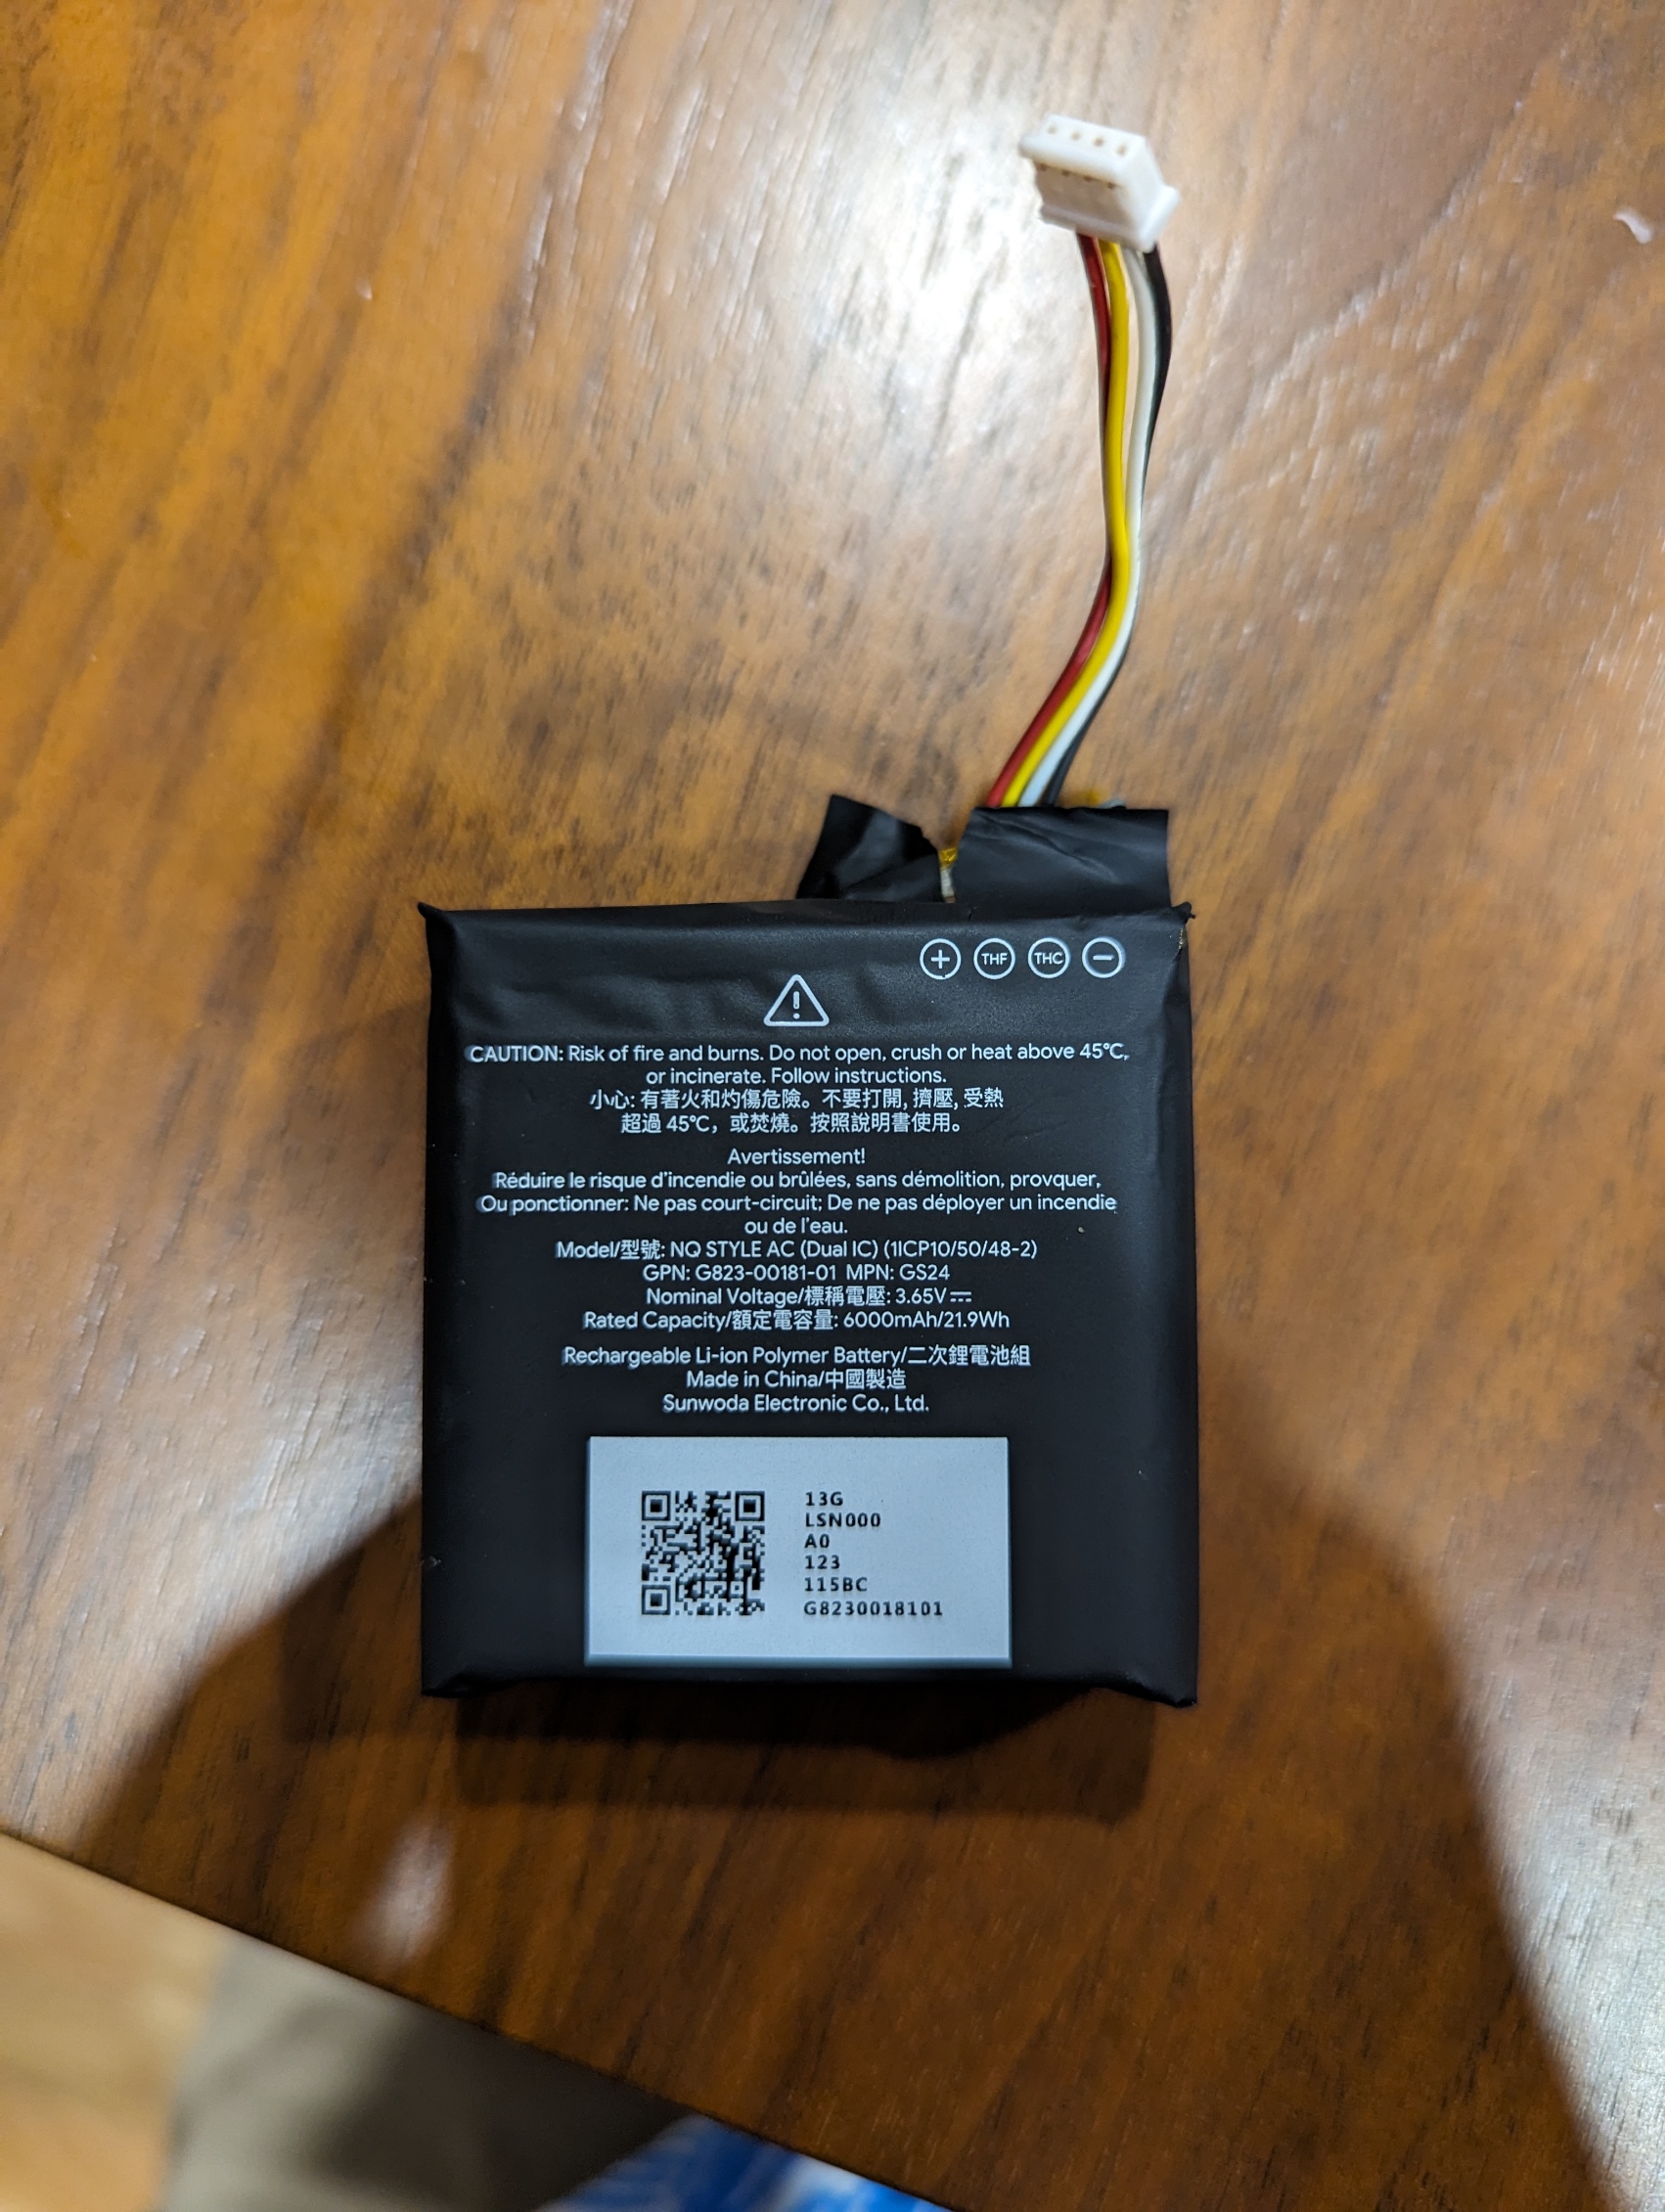
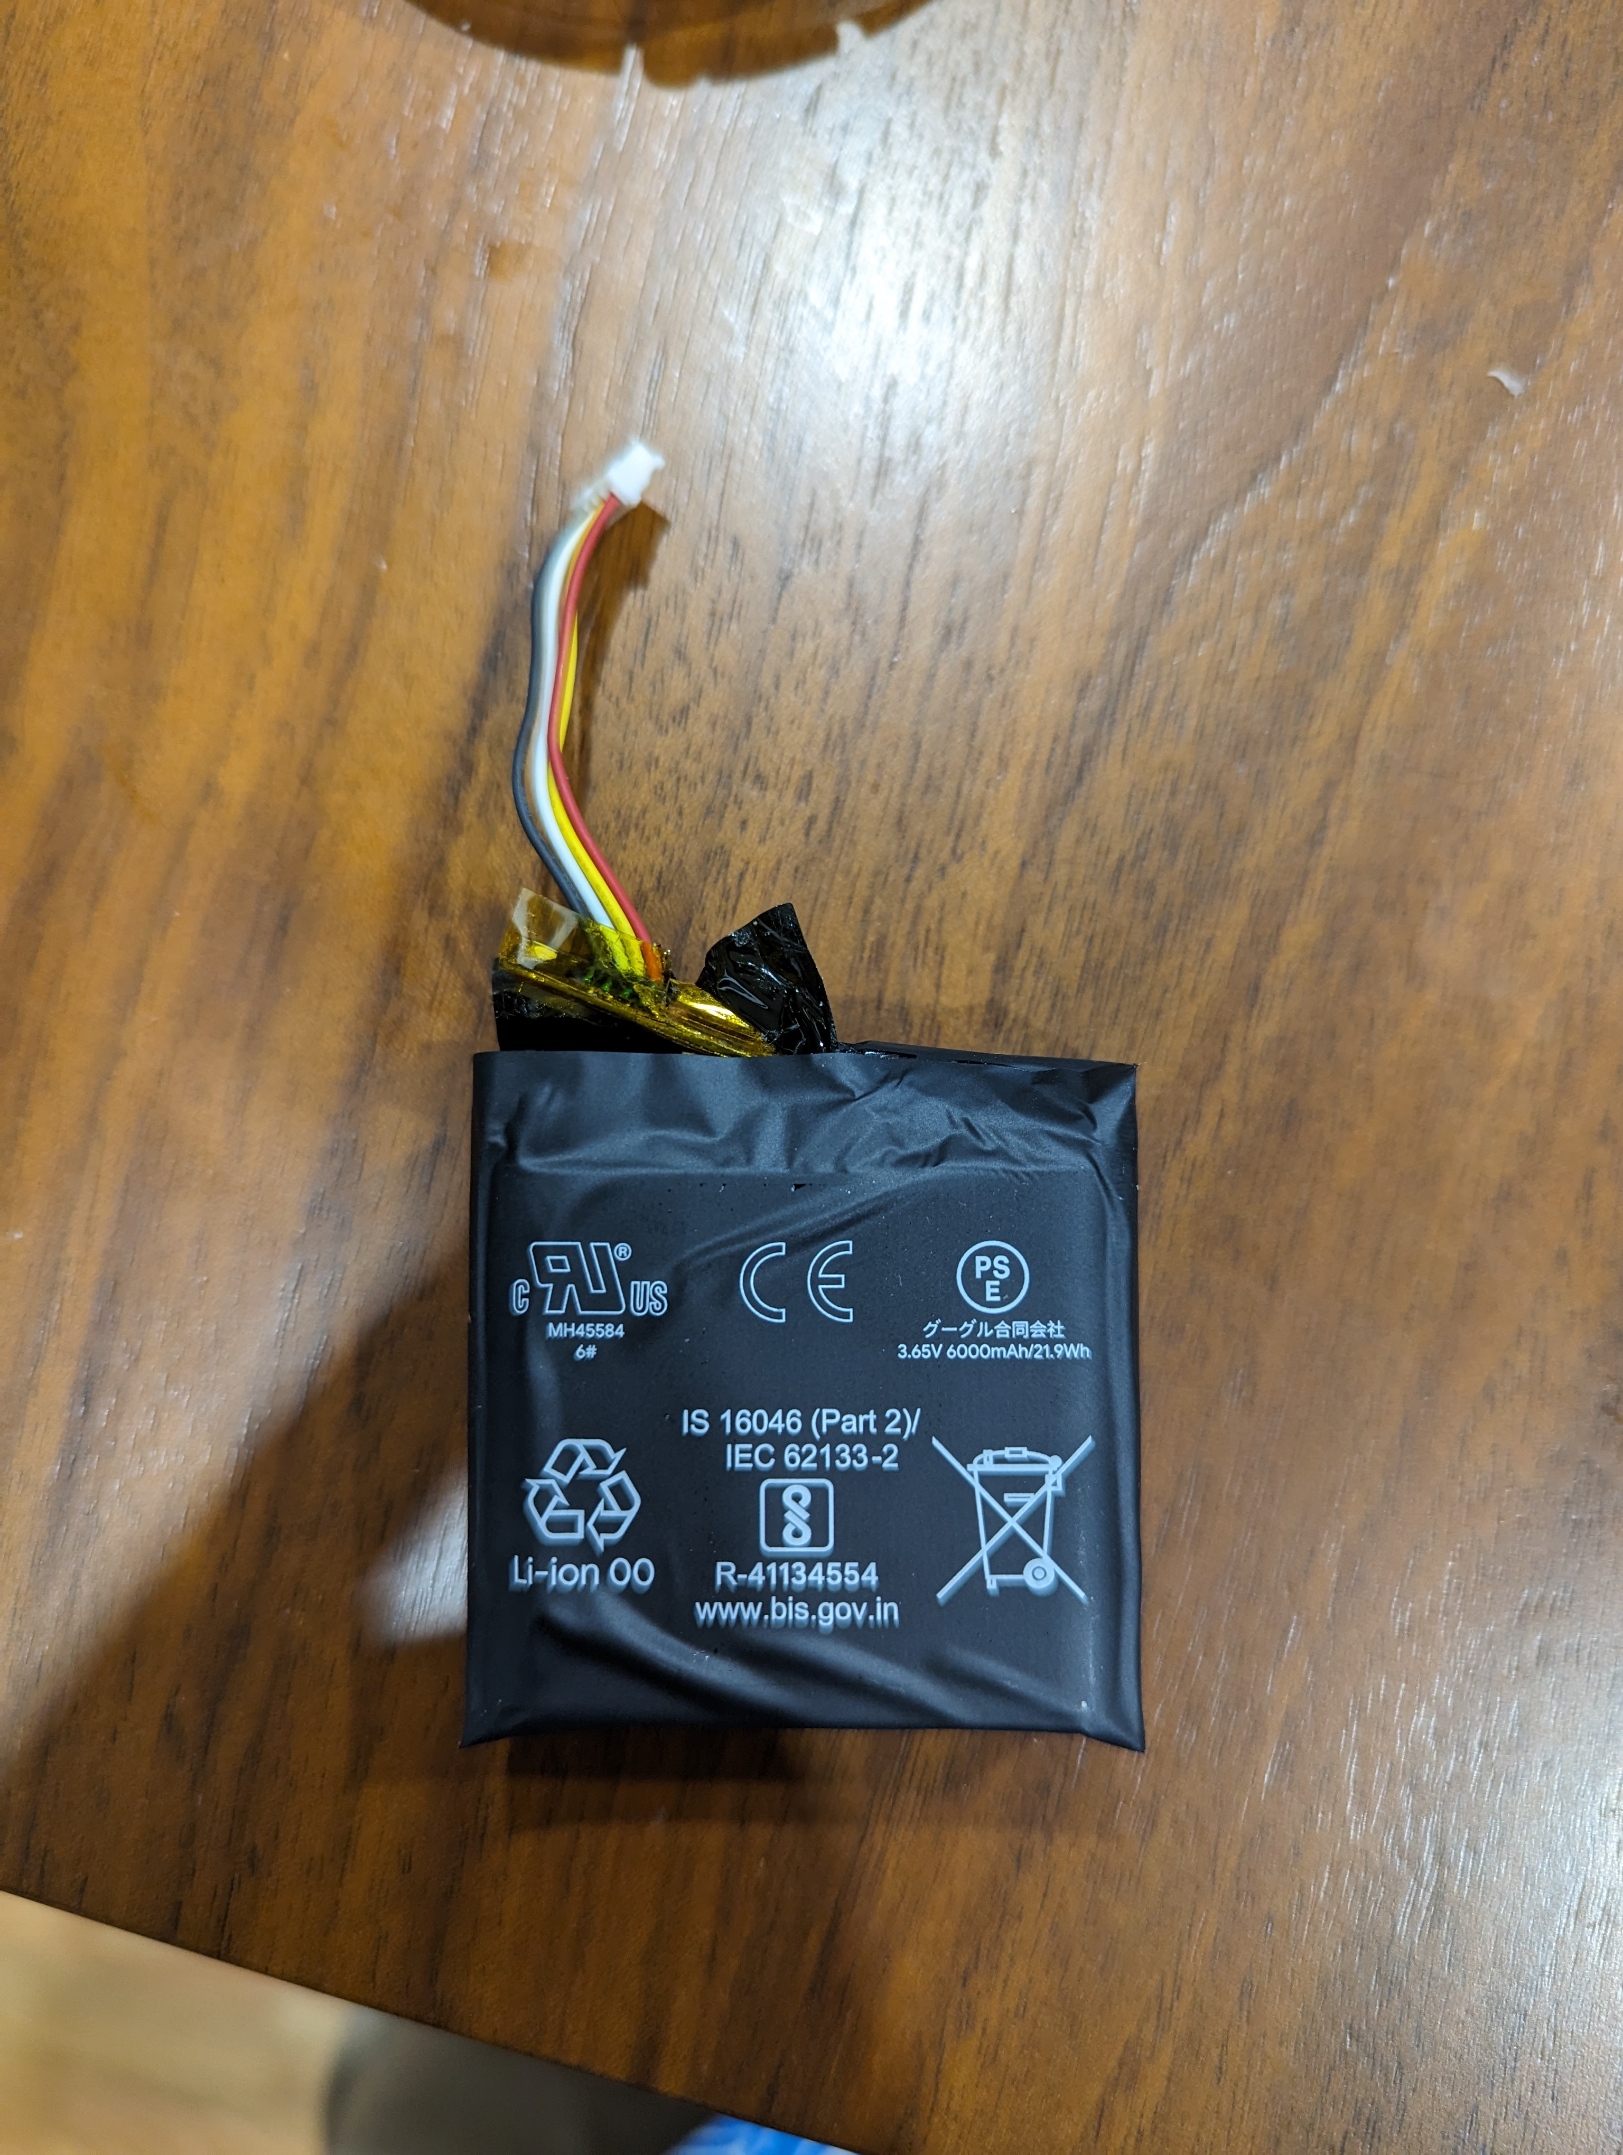
A note on the battery itself:
If you can’t find an OEM battery piece, you might be able to find a suitable replacement generic part. The battery has a 4-pin connector cable that’s about 4 inches long. It’s Li-ion Polymer rechargeable. Nominal Voltage is 3.65V. Capacity is 6000mAh. I’ve included pictures at the end.
So the Nest Outdoor Camera doesn’t have any visible external seams or screws. To get it open, you’ll have to pry out the black facade from the white plastic housing. This will require a sturdy but very thin spudger, or a very small flathead screwdriver. And caution.
There are four clamps that hold the facade in place. The facade is also split in two, with one opaque half and one very slightly translucent half. The translucent plastic is significantly softer. You’ll likely damage the edges of the plastic a bit, but it’s not such a big deal.
The four clamps you need to loosen are here:

The only danger of damaging the functional components is a ribbon cable which is positioned at the top of the camera (i.e. opposite of the side that has the mount point and speaker). Avoid jabbing anything sharp at the top. Focus on loosening and detaching the internal clamps at the marked positions. You’ll hear a click as they disengage, and that portion of the facade should become looser and easier to pry out of the housing.
Once the housing is free, be careful not to damage the ribbon cable. You can disconnect it, but it’s not strictly necessary to complete the replacement. I left it on. Just don’t twist it.
Now, using the long-tipped T6 screwdriver, loosen the four deep-welled screws.
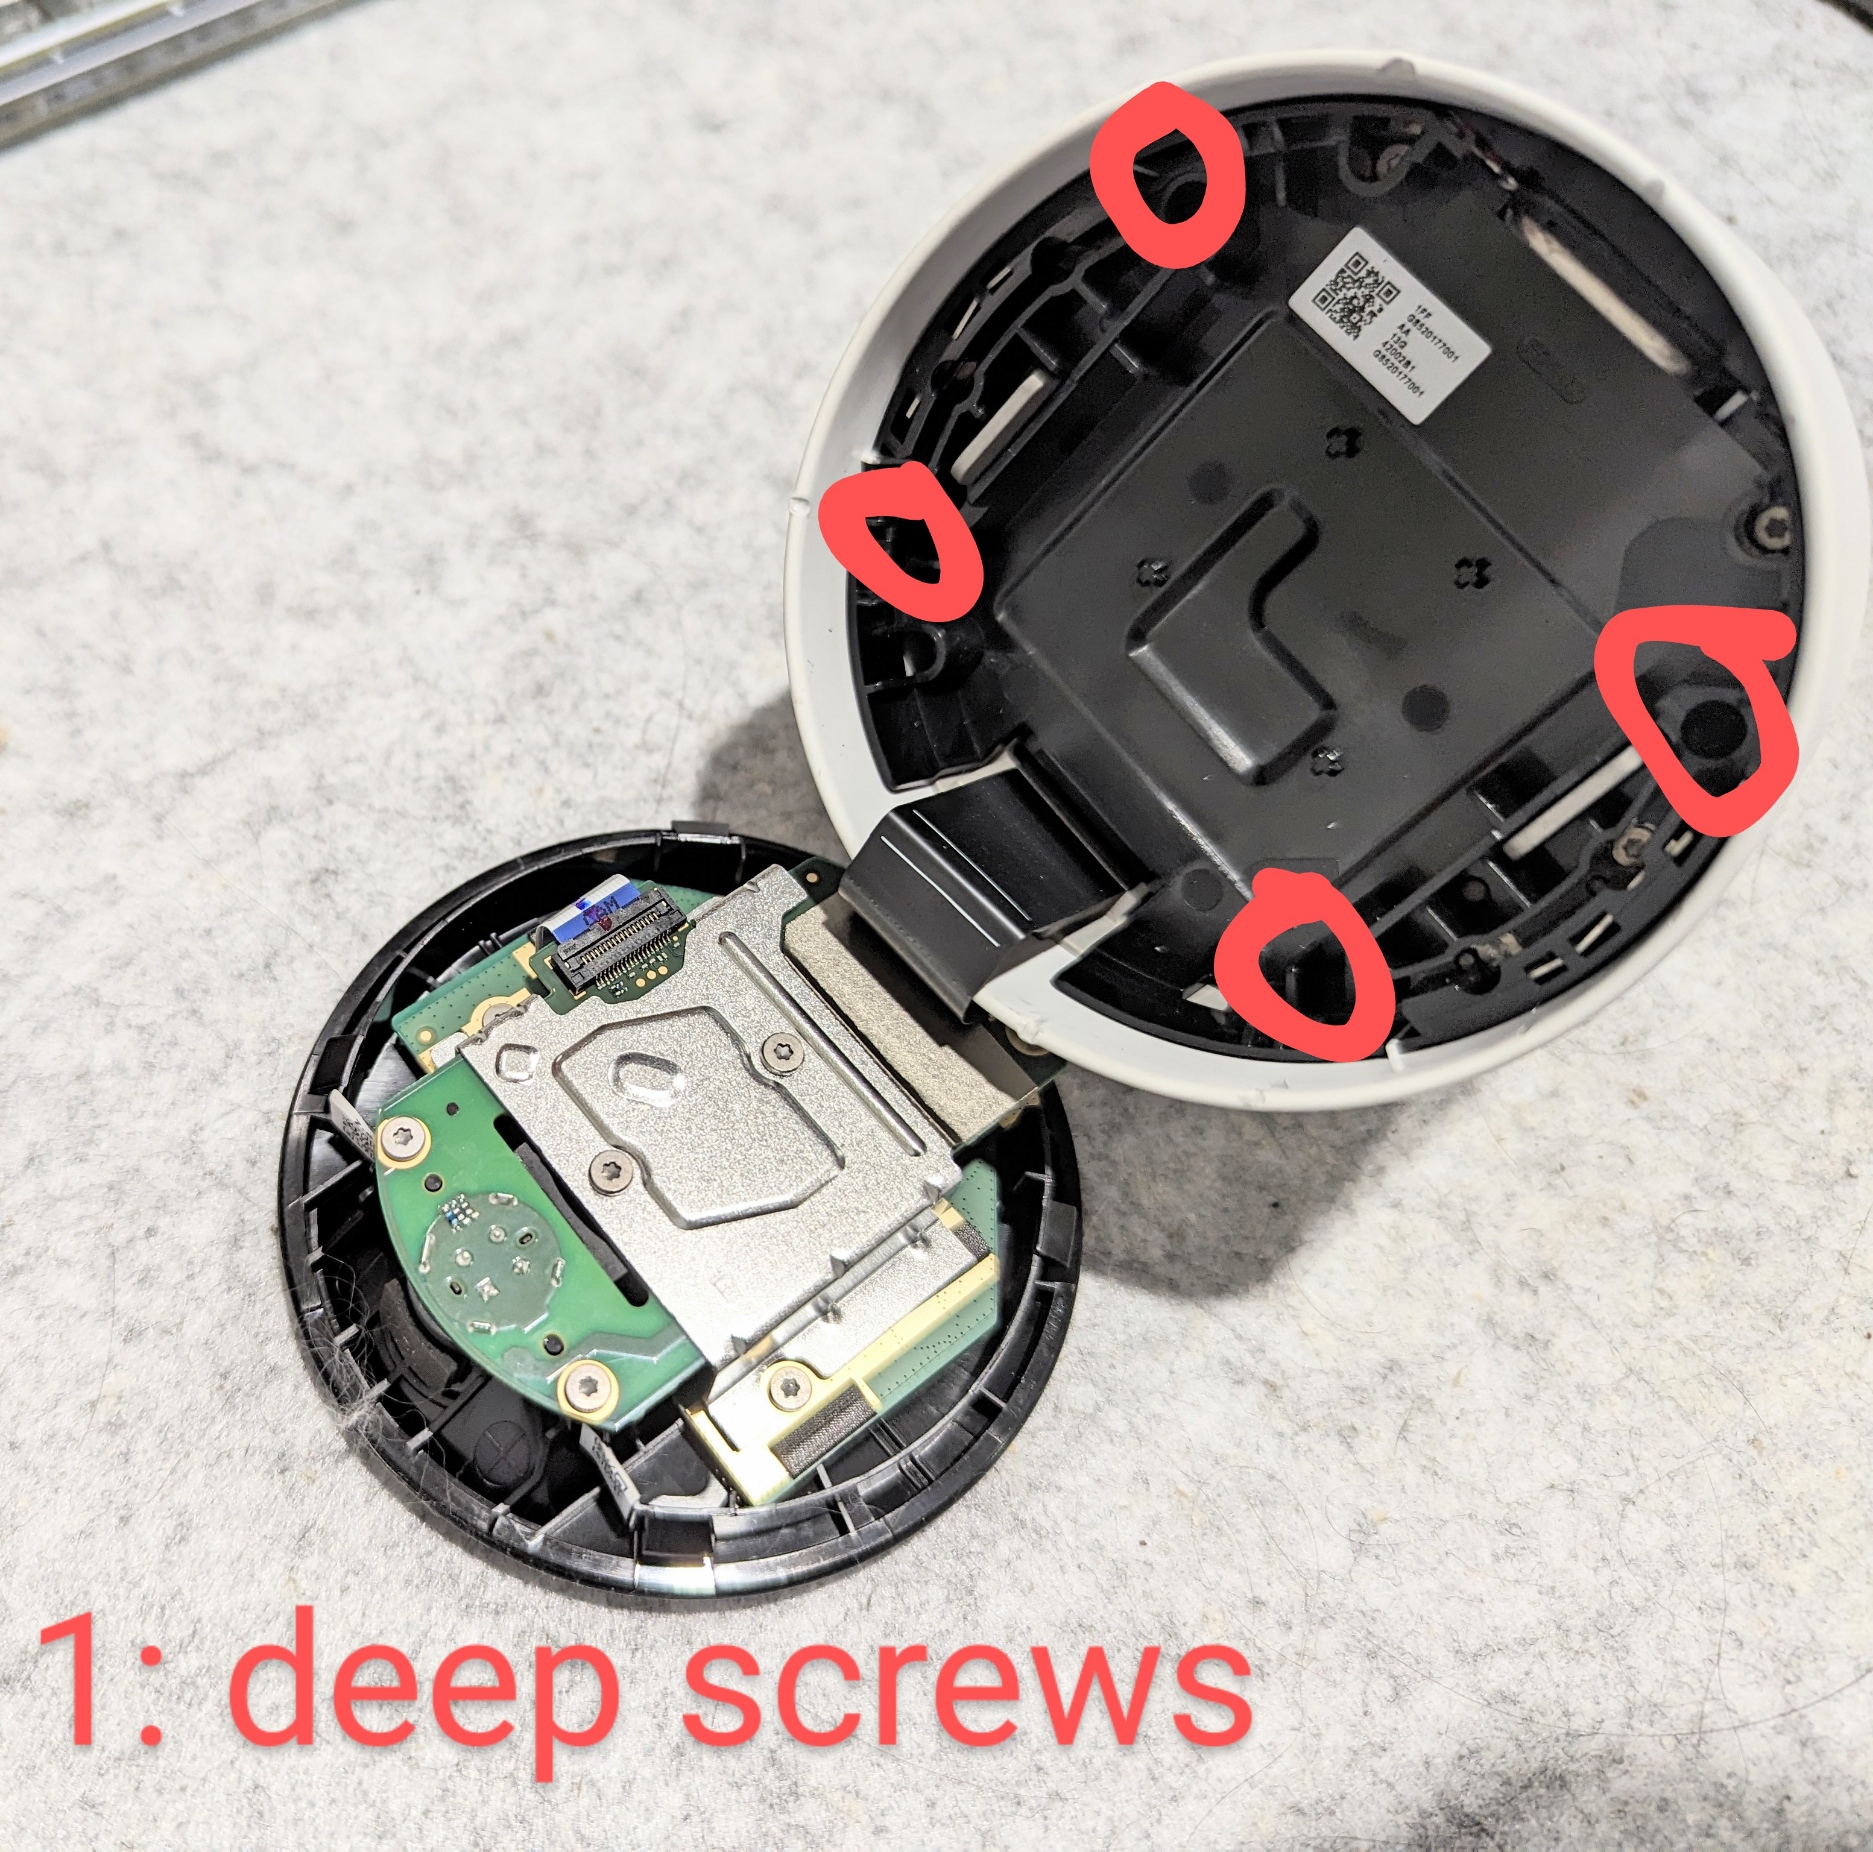
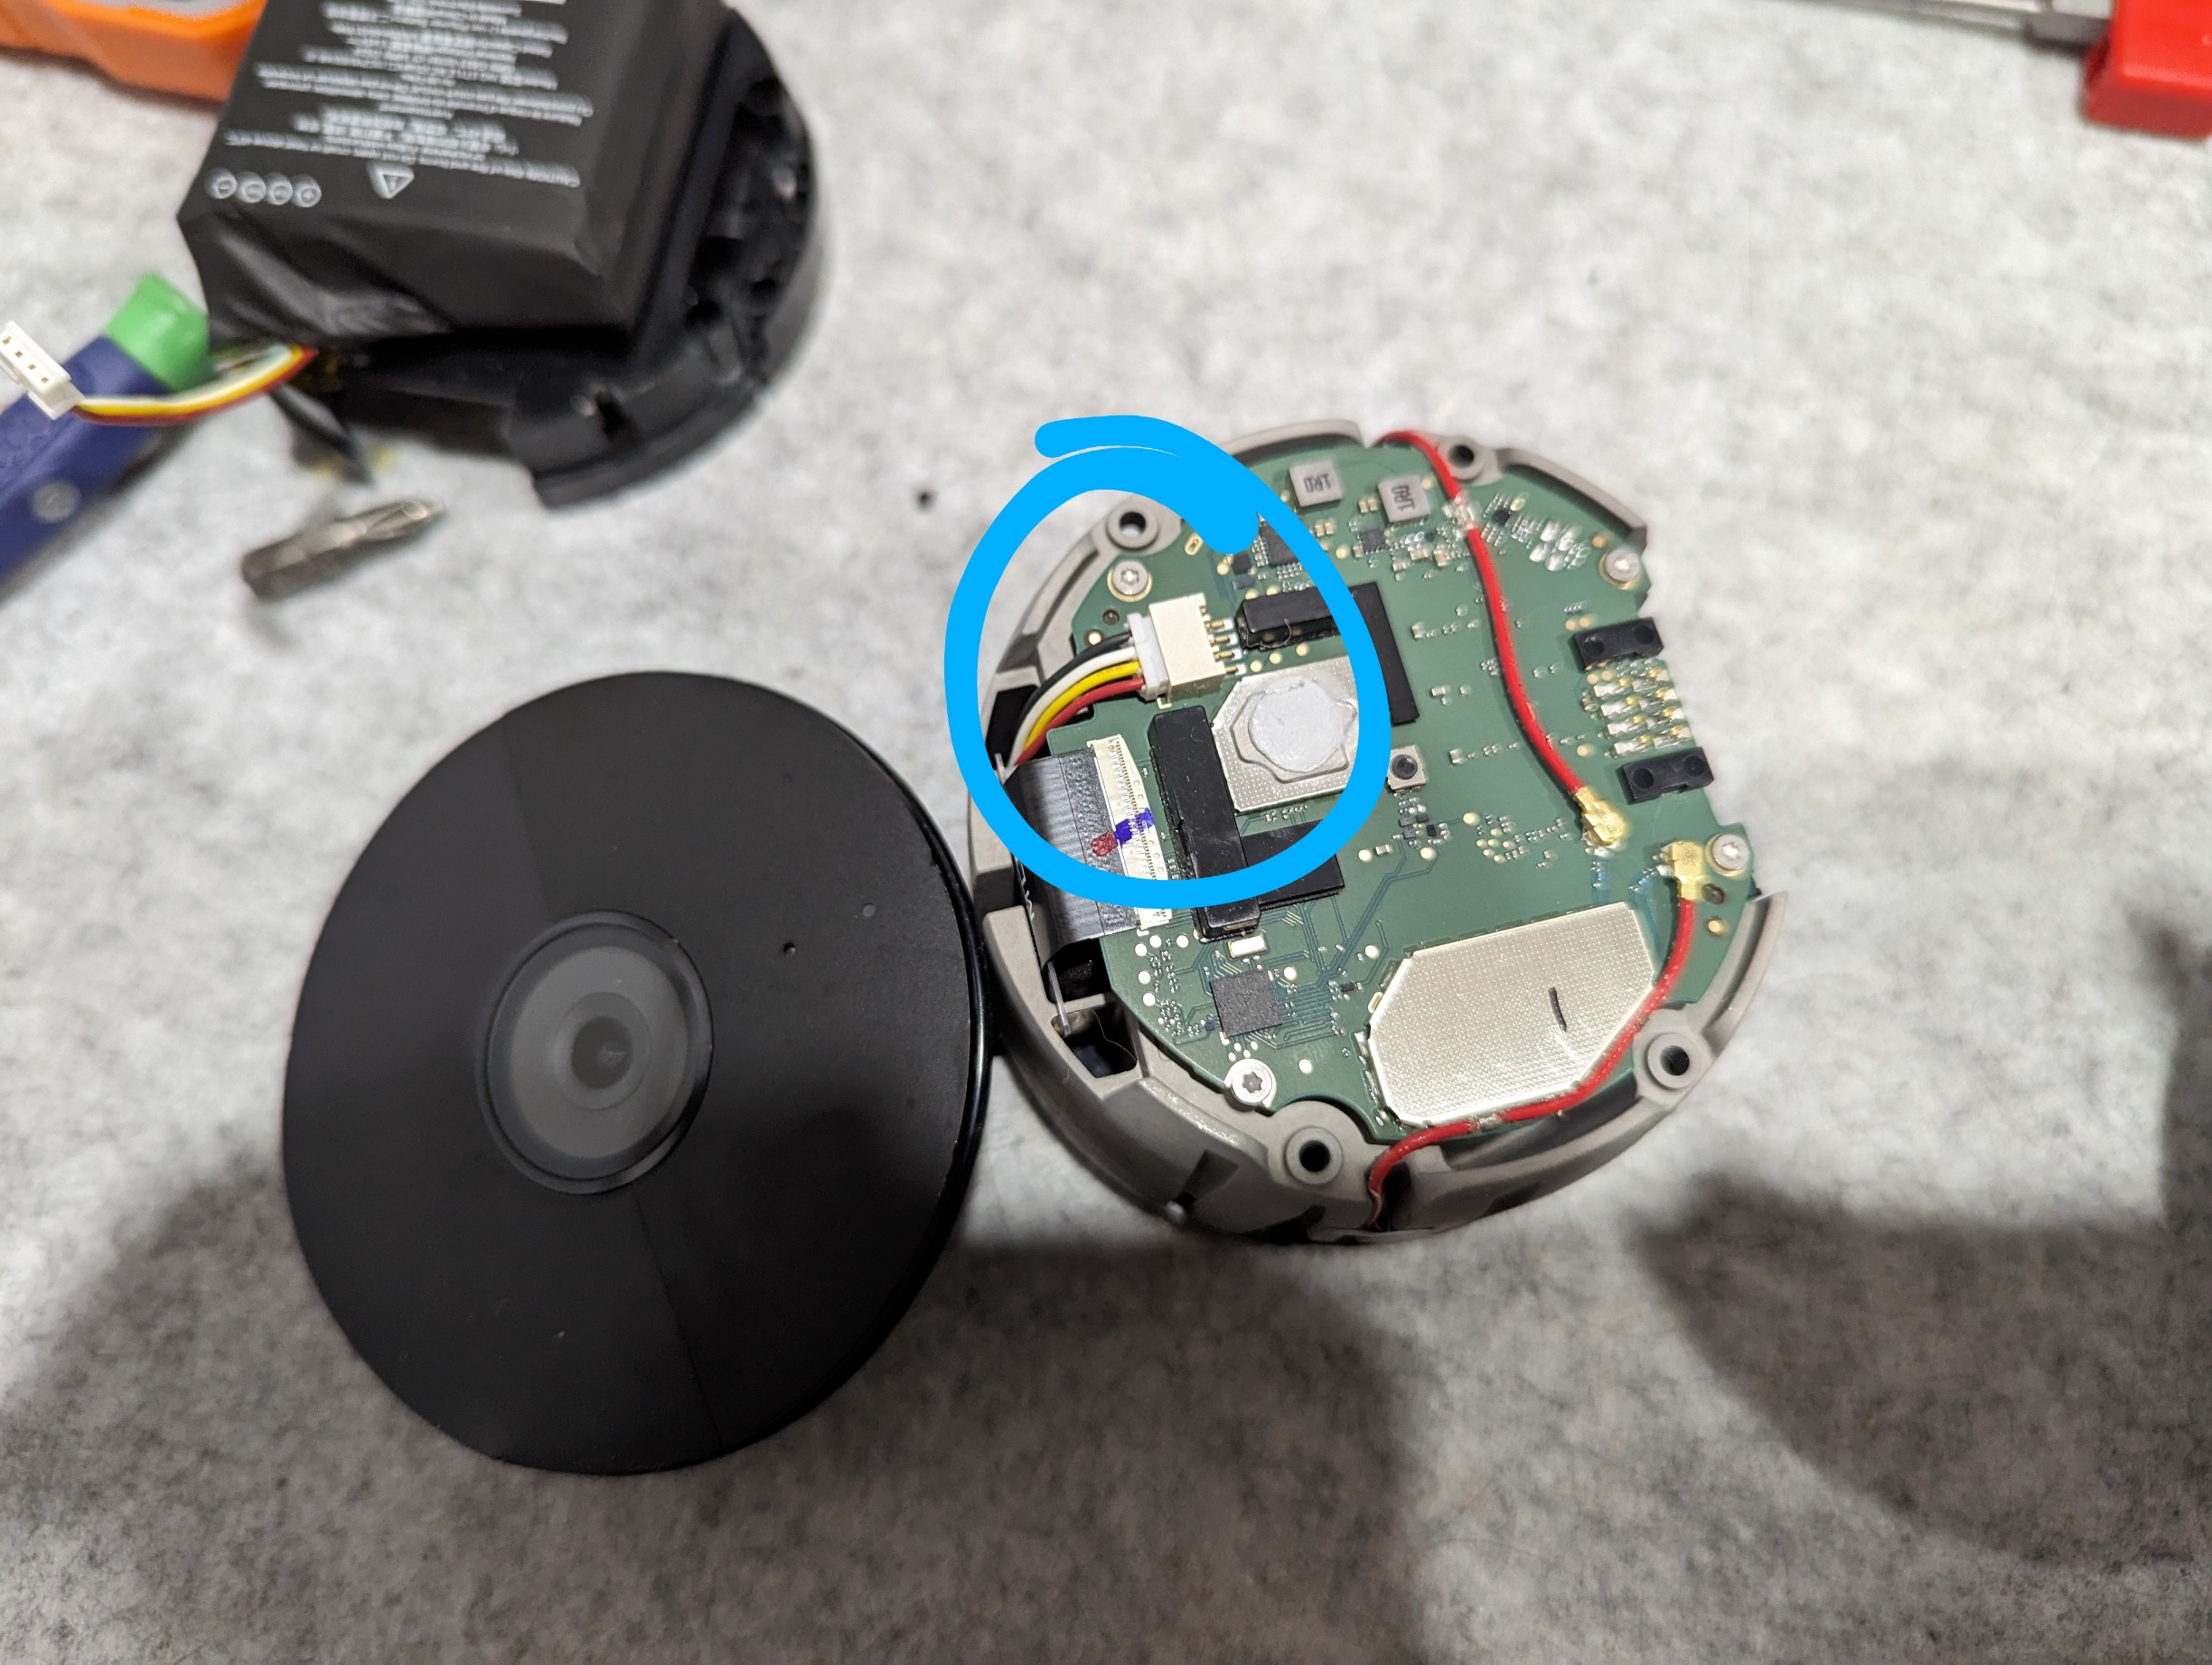
This should detach the interior components from the housing and allow you to slide them out. Disconnect the four-pin connector from the back of the component cluster, this is the battery lead. From there, you can loosen the four shallowest screws to slide off the black plastic battery piece.
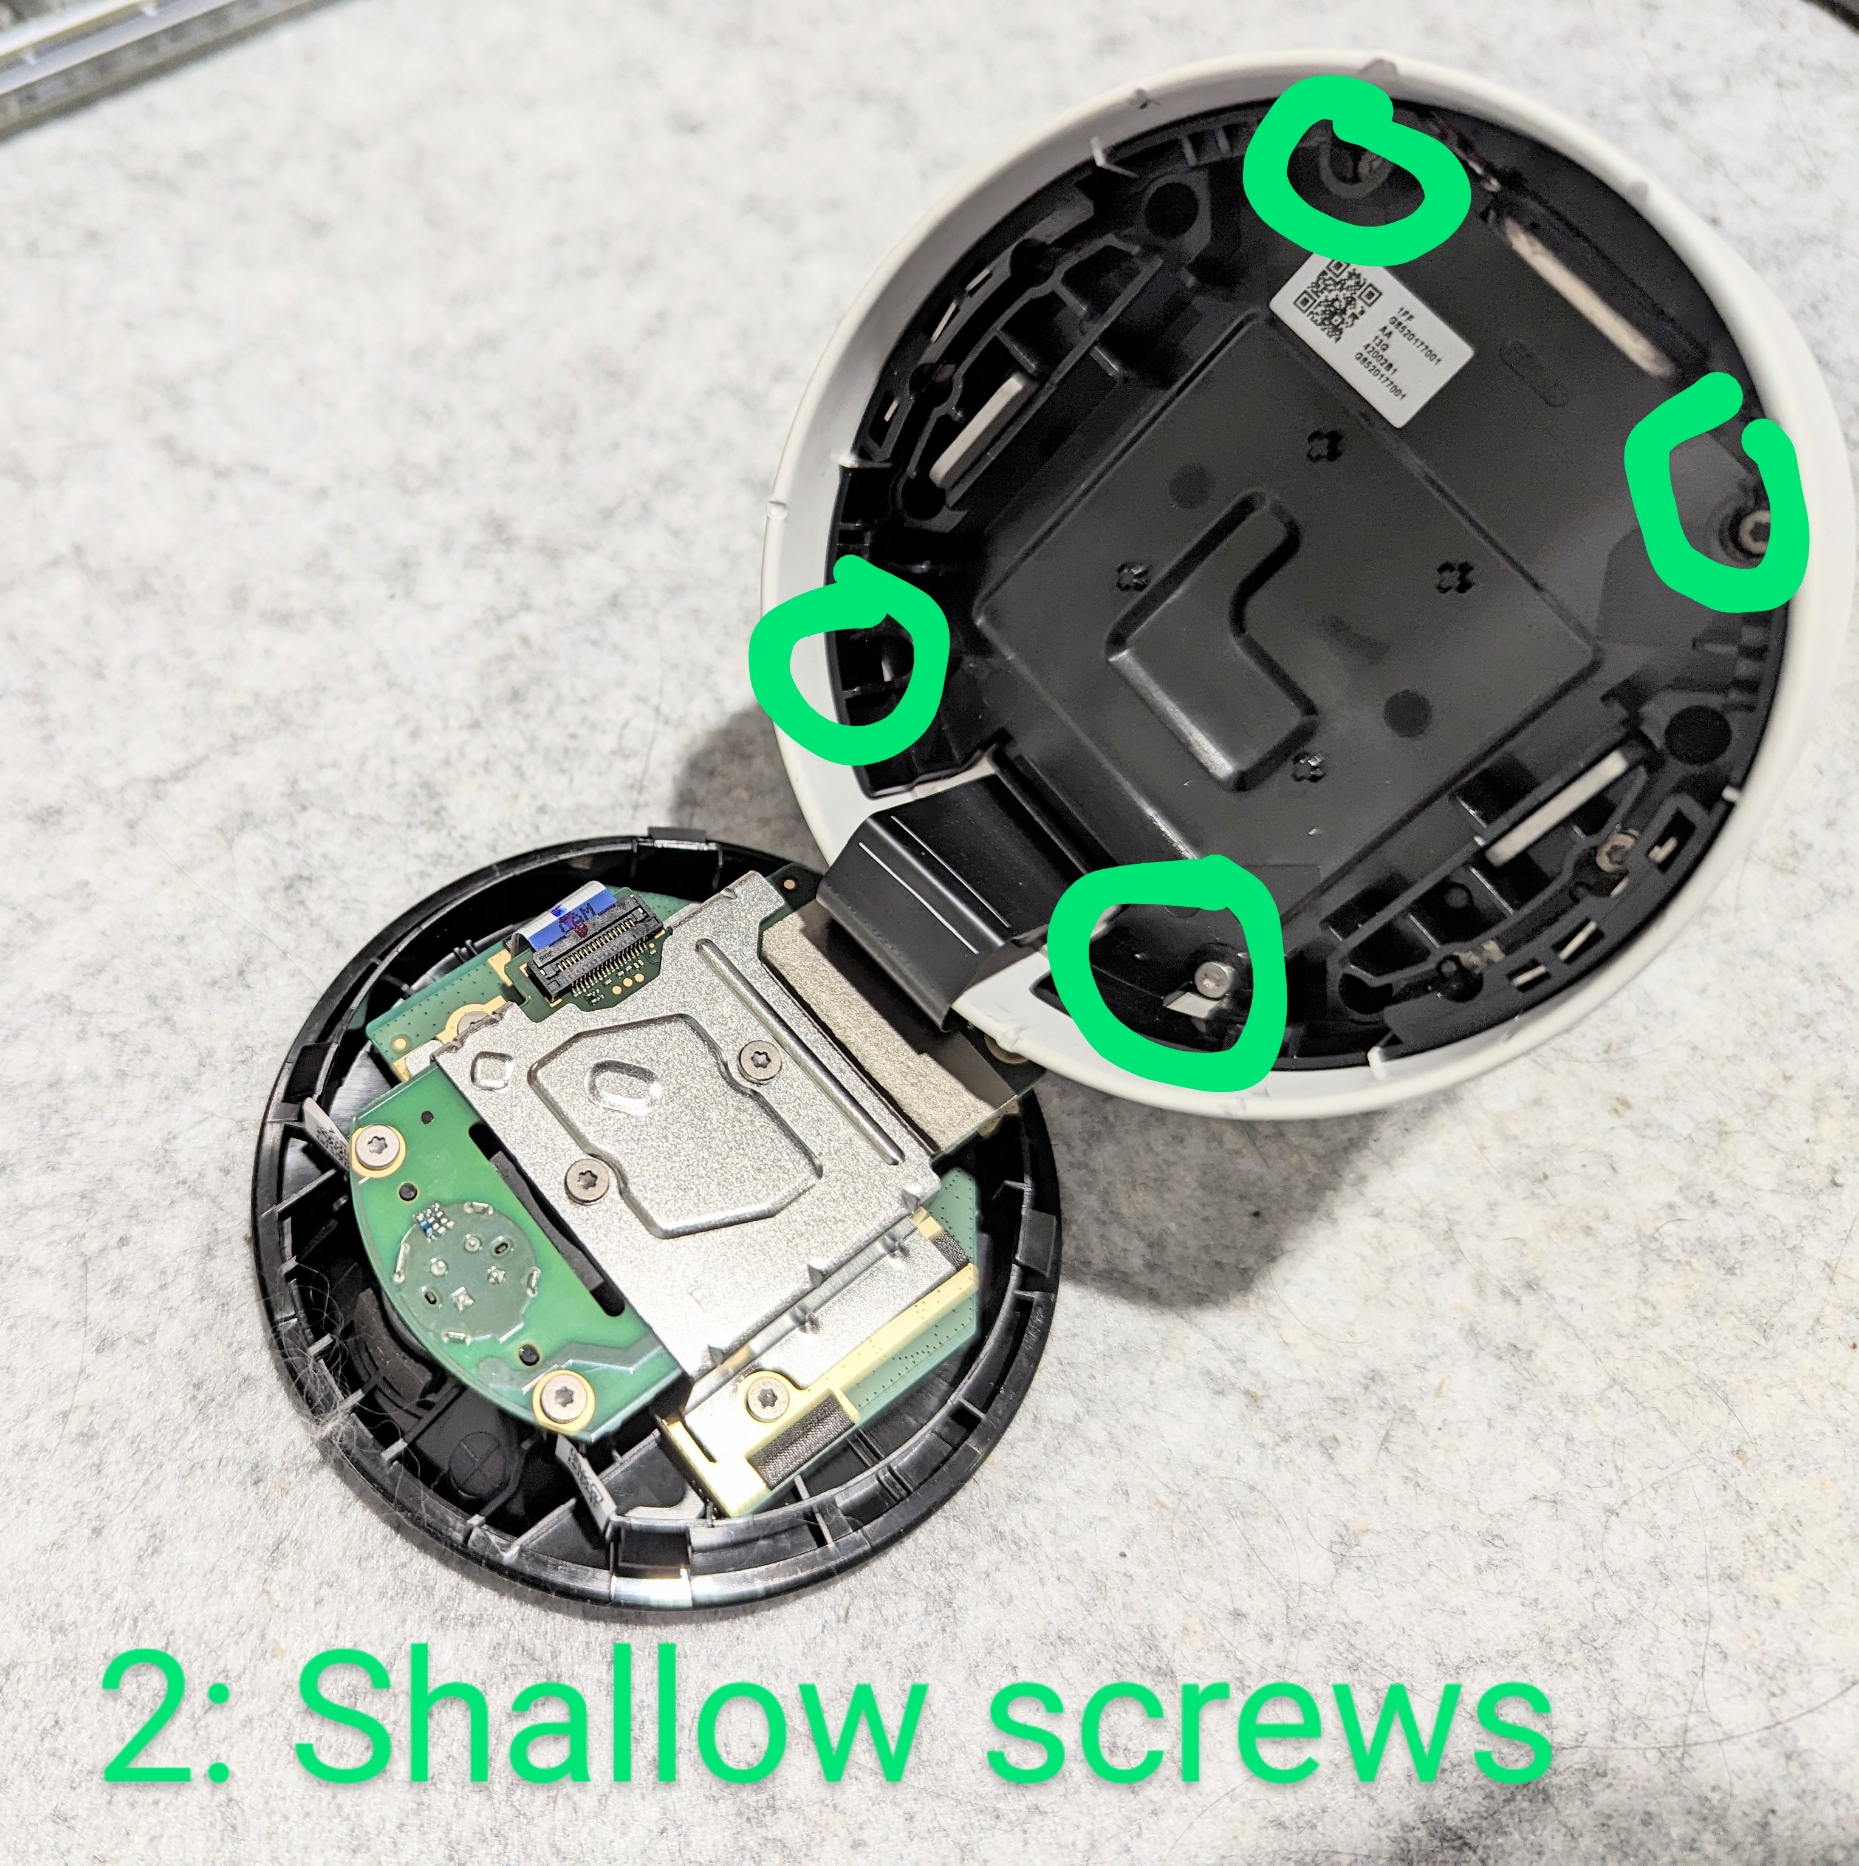
Replace with your new battery housing, slide the cable through and reconnect it to the mainboard on the back. Replace the four shallow screws, then slide the component cluster back into the housing and replace the four deep screws.
At this point you can test the device if you like before sealing it up. Once ready, use some force to re-insert the facade. I started with the weaker half already pressed in and pushed on the other half, just to be safe.
This worked for me. Hope it works for you!
Pictures of the battery
If this helps… good luck finding a generic version of this, though. It appears to me that there are actually 2 batteries combined with a logic board.